New Bosch 12V Generator — VW Type 1 1967–1973, Type 2 1967–1968 (98-9031-B)
New Bosch 12V Generator — VW Type 1 1967–1973, Type 2 1967–1968 (98-9031-B)
Couldn't load pickup availability
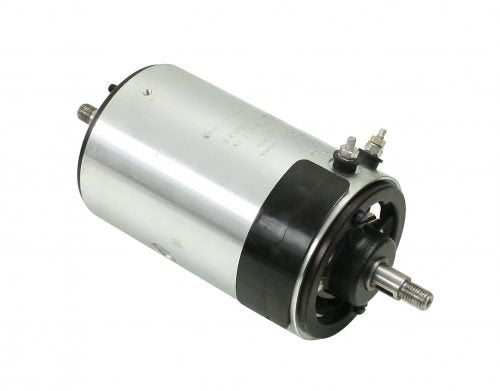
Bosch 12-Volt Alternator (New) – Type 1 & Type 2 (1967-1973)
Restore the reliability of your air-cooled charging system with a brand-new Bosch 12-Volt Generator. This is a 100% new unit, not a remanufactured core, ensuring maximum longevity and consistent output for your classic VW. Designed as a direct replacement for the transition-era Type 1 and Type 2 models, it provides the factory-correct fitment and period-correct look that enthusiasts demand.
Because this is a new unit, there is no core charge or return required, saving you the hassle and expense of shipping your old part back.
Key Features:
-
Genuine Bosch Quality: Built to original equipment specifications for a perfect fit and reliable performance.
-
100% New Construction: No used components; features all-new bearings, brushes, and windings.
-
Direct Fit: Specifically designed for 12V Type 1 (1967–1973) and Type 2 (1967–1968) engines.
-
Hassle-Free: No core required—keep your original or save on return shipping.
Installation Instructions: 12-Volt Generator (Type 1 & 2)
Replacing a generator is a straightforward task, but precision is key to ensuring your belt alignment and tension are correct. Safety First: Always disconnect the battery before beginning any electrical work.
1. Preparation & Removal
-
Disconnect the Battery: Remove the negative terminal to prevent accidental shorts.
-
Remove the Belt: Loosen the nut on the generator pulley. Remove the outer half of the pulley and the fan belt. Keep track of your adjustment shims.
-
Disconnect Wiring: Mark and remove the wires from the terminals (typically D+ and DF). Note the ground wire location if applicable.
-
Remove Components: * Remove the generator strap bolt and pull the strap back.
-
Remove the four bolts securing the fan shroud backing plate to the generator.
-
Carefully pull the generator toward the passenger side (or rear) to slide it out of the fan shroud.
-
2. Transferring the Fan
-
You will need to transfer your original cooling fan and hub to the new unit.
-
Important: Inspect the fan for cracks or chips. An unbalanced fan can vibrate and destroy the bearings on your brand-new Bosch unit.
-
Torque the fan nut to approximately 40 ft-lbs. Ensure the fan spins freely without hitting the backing plate.
3. Installation
-
Seat the Generator: Slide the generator and fan assembly back into the fan shroud. Ensure the cooling fan is properly centered in the shroud opening.
-
Secure Backing Plate: Reinstall the four screws on the fan shroud backing plate.
-
Tighten the Strap: Position the generator so the terminals are upright and tighten the mounting strap.
-
Wiring: Reconnect the wires to the correct terminals (D+ and DF). Ensure the connections are clean and tight.
-
Set Belt Tension: Reinstall the pulley and belt. Use the shims between the pulley halves to achieve approximately 1/2" (13mm) of deflection in the belt.
Tip: Extra shims belong on the outside of the pulley, under the nut.
4. Technical Step: Polarizing the Generator
Since this is a brand-new DC generator, it may need to be polarized to ensure it charges in the correct direction.
-
Reconnect the battery.
-
With the engine OFF, use a small jumper wire to momentarily (for about 1 second) connect the B+ (Battery) terminal on the regulator to the D+ terminal on the generator.
-
You should see a small spark; the generator is now polarized.
5. Testing
Start the engine and verify that the "Gen" or "Alt" light on the dashboard turns off. Use a multimeter at the battery; you should see a reading of approximately 13.8 to 14.2 volts while the engine is running at high idle.
#E40
Share