VW Bus Weld-On Front Beam Adjusters | Type 2 Bus 1955–1979 | Adjustable Ride Height (16-9916-0)
VW Bus Weld-On Front Beam Adjusters | Type 2 Bus 1955–1979 | Adjustable Ride Height (16-9916-0)
Couldn't load pickup availability
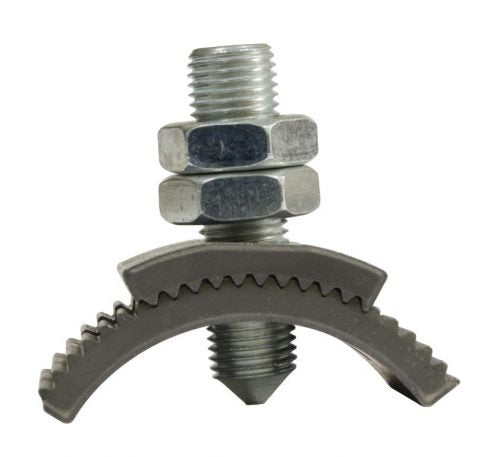
VW Bus Weld-On Front Beam Adjusters — Adjustable Ride Height for Type 2 (1955–1979)
Take full control over your stance with these Weld-On Beam Adjusters. Designed specifically for the VW Type 2 Bus, these heavy-duty adjusters convert a fixed-height factory axle beam into a fully adjustable setup. Whether you want a mild drop or a more aggressive profile, they provide the mechanical versatility needed to dial in the perfect ride height.
For the "nothing to hide" fabricator, these are a staple of any beam modification project — a clean, secure way to clock your torsion leaves while keeping the suspension functional and adjustable.
Vehicle Fitment
VW Bus (Type 2): 1955–1979
Key Features & Benefits
Fine-Tune Your Stance: Adjust the front end to level out your Bus or clear specific wheel and tire combinations.
Maintain Spring Tension: Rotate the center anchor point while maintaining proper tension — unlike "cutting and turning," which permanently alters spring rate.
Future-Proof Your Build: Raise or lower the vehicle for different tire setups or storage without removing the beam again.
Weld-On Installation: Welded to the beam tubes by a qualified fabricator; two jam nuts are included to lock in your height.
Technical Specifications
Type: Weld-on front beam adjusters
Included Hardware: Two jam nuts to lock ride height
Part Number: 16-9916-0
Explore Related Categories
Browse more in Suspension VW Bus Steering.
Share